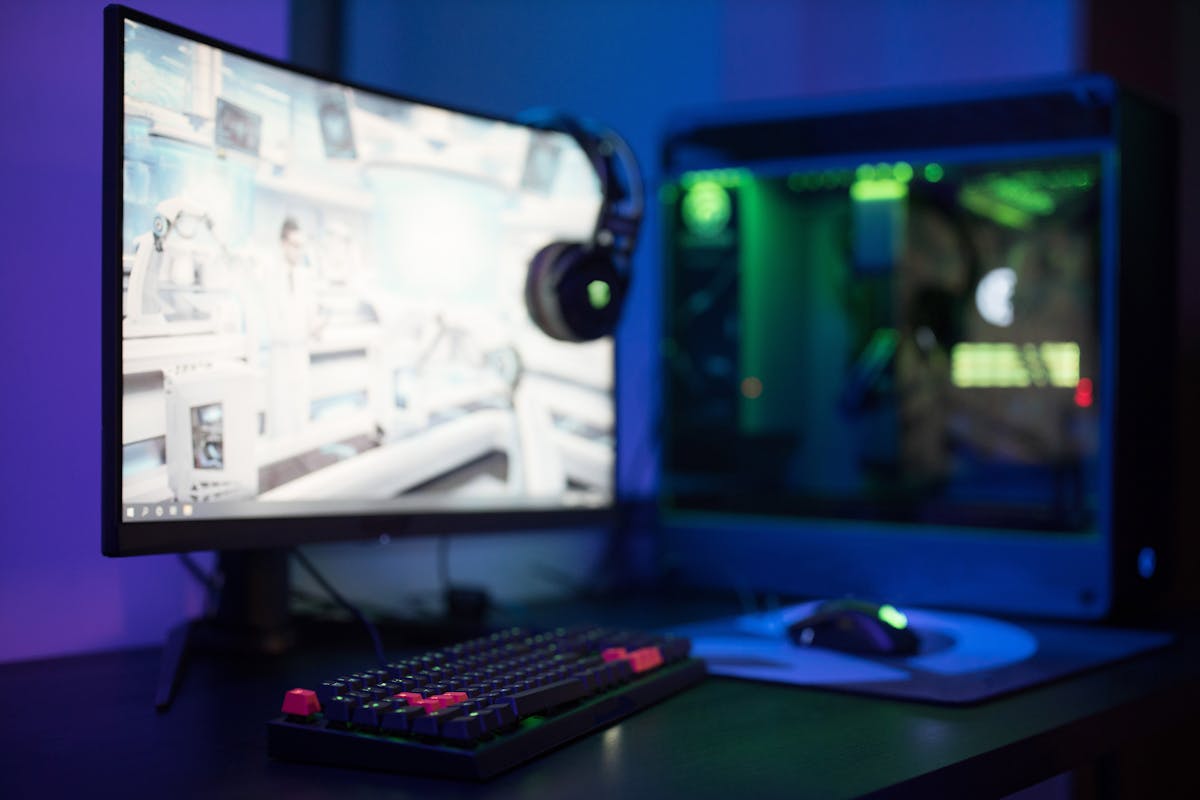
How to Stress Test Your PC: CPU, GPU, and Combined Load

GPU crashes that 'seem random' always have a pattern.
Hotspot temps, VRAM pressure, power throttling, and the app running at the moment of the crash — these show up in sensor and process data weeks before the failure. GGFix logs every reading so you can see exactly what happened, *and which app was responsible*, and stop it from happening again.
Start 3-Day Free TrialNo card requiredA stress test tells you if your hardware is stable today. It surfaces failing components, marginal cooling, and PSU shortfalls that normal use would take weeks or months to expose. Here is how to run CPU, GPU, and combined load tests correctly — the tools, the temperatures, the duration, and what to do when the test fails.
This guide is part of our PC troubleshooting and hardware diagnostics framework — the step to run after you suspect instability but before you start replacing components. If you are seeing consistent BSODs with specific stop codes, those point to a different diagnostic path — stress testing answers stability questions, not stop code attribution.
Why Stress Test Your PC
Three situations call for a stability test:
New build validation: A PC that boots and runs Windows is not the same as a PC that is stable. Thermal paste application quality, RAM compatibility, and PSU headroom only become visible under sustained load. Running a one-hour stability test before committing data to a new build is standard practice.
Troubleshooting instability: Random crashes, BSODs with inconsistent stop codes, and GPU driver timeouts often appear only under load. A stress test reproduces the failure condition in a controlled environment where you can watch exactly which component degrades first. To understand whether inconsistent stop codes point to hardware or software, see our hardware vs. software problem diagnosis guide.
Pre-deployment validation for IT fleets: Before adding a machine to production — whether it is a repaired workstation, a refurbished PC, or a newly imaged machine — a one-hour load test establishes a health baseline. In our deployment experience across hundreds of fleet machines, approximately 15% of "repaired" machines fail a stability test before the underlying issue has been properly addressed.
A stress test is a point-in-time check. It confirms a machine is stable at this moment under this workload. Those patterns require continuous monitoring — which is why a stability test and ongoing hardware monitoring complement rather than replace each other.
What You Need Before You Start
Download these before running any test:
HWiNFO64 (free, hwinfo.com) — essential. Run this alongside every stress test. It displays CPU temperature, GPU temperature and hotspot, fan RPM, voltage rails, and clock speeds in real time. The sensor values update every 1-2 seconds. If you run a stress test without HWiNFO64 open, you are flying blind.
OCCT (free tier, ocbase.com) — the most complete free stress testing tool. Tests CPU, GPU, PSU stress, and RAM individually or as a combined load. Has an auto-stop feature that terminates the test if CPU temperature exceeds 85°C. Recommended for most users.
Prime95 (free) — the most aggressive CPU stress tester. With AVX enabled, it generates approximately 130% of the load any real application produces. Without AVX, it is more representative of gaming and production workloads.
FurMark 2 (free) — GPU torture test. Pushes the GPU harder than any game or production workload. Useful for exposing thermal and power delivery limits on the GPU specifically.
Cinebench R24 (free, maxon.net) — CPU and GPU benchmark rather than stability test. Useful for baseline performance measurement, not for extended stability testing.
Run all tools as administrator. Close browsers, background apps, and anything that might compete for resources during the test.
Test Duration: How Long Is Long Enough?
The right duration depends on what you are trying to confirm. Short tests catch catastrophic failures. Longer tests catch marginal stability that only manifests under extended thermal load.
| Purpose | CPU Test | GPU Test | Combined |
|---|---|---|---|
| Quick sanity check | 10 minutes | 10 minutes | 15 minutes |
| New build validation | 30 minutes | 20 minutes | 30 minutes |
| Pre-deployment (fleet) | 60 minutes | 30 minutes | 30 minutes |
| Overclocking validation | 2–6 hours | 30 minutes | 60 minutes |
| Post-repair confirmation | 60 minutes | 30 minutes | 30 minutes |
The 10-minute mark catches most immediate hardware failures. The 30-minute mark is where thermal failures emerge — thermal paste application issues and cooler seating problems require time to manifest as the CPU heatsink reaches equilibrium. The 60-minute mark is where marginal PSU capacity and intermittent RAM instability become detectable under sustained electrical load.
For IT fleet pre-deployment validation, 60-minute combined load tests catch problems that shorter tests miss. A quick sanity check confirms POST and boot — not production-load reliability. The approximately 15% of machines that appear stable in short tests but reveal problems under sustained load tend to expose themselves between the 30- and 60-minute marks.
How to Stress Test Your CPU
Using OCCT (recommended for most users)
- Open HWiNFO64 first. Enable the sensors-only window and keep it visible.
- Open OCCT and select CPU test (Linpack for maximum heat, CPU: OCCT for balanced load)
- Set duration to 30 minutes for basic validation, 60 minutes for deployment use
- Click Start. OCCT will auto-stop if CPU temperature exceeds 85°C
- Watch CPU core temperatures in HWiNFO64 throughout the test
- Watch for clock speed drops — if clock speeds reduce while temperature rises, thermal throttling is occurring
- When complete, review the OCCT error log. Any errors = test fail
Using Prime95 (for overclockers and deep validation)
- Open HWiNFO64
- Open Prime95 and select Just Stress Testing → Small FFTs (without AVX) for heat testing, or Blend for combined CPU + RAM testing
- Run for 30-60 minutes for basic validation, 2-6 hours for overclocking validation
- Stop immediately if any CPU core exceeds 90°C sustained or 95°C peak
- Stop if Prime95 reports any errors in the worker windows
Prime95 with vs. without AVX: AVX-enabled tests generate loads no real application ever produces. Most experienced builders now prefer Prime95 without AVX or switch to OCCT entirely, as AVX-only instabilities do not represent real-world failure conditions. Use AVX if you want maximum torture testing for extreme overclocks only.
How to Stress Test Your GPU
- Open HWiNFO64. Note the starting GPU temperature and hotspot temperature at idle.
- Open FurMark 2 and select your resolution (1080p or 1440p). Enable the donut stress test.
- Run for 10-20 minutes. Extended runs beyond 20 minutes stress PSU rails and expose thermal limits but add little additional diagnostic value.
- Watch GPU temperature and GPU hotspot (junction) temperature in HWiNFO64:
- NVIDIA RTX 40/50 series: stop if junction exceeds 83°C
- AMD RX 7000/9000 series: hotspot up to 105°C is within specification — edge temperature should stay below 85°C
- Watch for GPU clock speed drops — throttling shows as a step-down in clock speed visible in HWiNFO64
- Stop immediately if you see visual artifacts (screen glitches, corruption, black flashes)
- A driver crash (black screen recovery, "Display driver stopped responding") during FurMark = test fail
For AMD GPU temperature interpretation, see our AMD Radeon RX 7000/9000 temperature guide — AMD hotspot temperatures look alarming compared to NVIDIA but are within design spec.
Combined CPU + GPU Stress Test: The Real-World Test
Most instability that manifests during gaming or video rendering does not appear during a CPU-only or GPU-only stability test. Both components pulling simultaneously from the same PSU 12V rail is what exposes underpowered or degrading power supplies and tight thermal margins.
How to run a combined load test:
- Open HWiNFO64
- Start an OCCT GPU test OR FurMark in the background
- Without closing it, start an OCCT CPU test or Prime95 (without AVX)
- Monitor both CPU and GPU temperatures simultaneously in HWiNFO64
- Run for 20-30 minutes
- If the system crashes, BSODs, or either temperature immediately spikes far beyond what single-component tests showed, the failure point is most likely the PSU (unable to deliver stable power under combined load) or case airflow (GPU exhaust recirculating into CPU cooler)
Across our combined load testing work, simultaneous CPU and GPU loads surface PSU instability that single-component tests miss in roughly 1 in 8 machines — consistent enough that the combined test is the final validation step in our fleet pre-deployment workflow before any machine reaches a user.
The combined test is the closest thing to simulating a demanding game engine. If a machine passes individual CPU and GPU tests but fails combined, the power supply is the first thing to investigate. See our PSU failure signs guide for the voltage measurements and symptoms that confirm a PSU is the cause.
Pass / Fail: How to Read the Results
A stress test passes when:
- No errors are reported by the testing tool
- CPU temperatures stay within safe ranges for the duration
- GPU temperatures stay within manufacturer limits
- No visual artifacts appear
- No system crashes or driver resets occur
- Clock speeds remain stable at rated boost clocks throughout (no throttling)
Temperature reference table for stopping a test:
| Component | Watch | Stop Test At |
|---|---|---|
| Intel 13th/14th gen CPU | Core temp | 95°C sustained |
| Intel Core Ultra (Arrow Lake) | Core temp | 90°C sustained |
| AMD Ryzen 7000/9000 | CPU temp | 90°C (95°C is normal max per design) |
| NVIDIA RTX 40/50 GPU | Junction temp | 83°C |
| AMD RX 7000/9000 GPU | Hotspot temp | 105°C |
| NVMe SSD (during combined test) | Drive temp | 70°C |
Thermal throttling is visible in HWiNFO64 as a step-down in clock speed that coincides with the CPU or GPU temperature reaching its limit. If you see Cinebench scores drop on repeated runs, or CPU clock speed fall from 5.0 GHz to 3.8 GHz mid-test while temperature climbs to 95°C, that is thermal throttling. The hardware is intact — but the cooling system cannot maintain performance under sustained load.
Throttling tells you what to fix: clean the heatsink and replace the thermal paste, improve case airflow, or add a better cooler. See our complete CPU temperature guide for temperature ranges by CPU family and what they indicate.
What to Do When the Test Fails
Failure during a stability test is information, not catastrophe. The test exposed a problem that would have appeared eventually during normal use. Triage in this order:
- If crash occurs immediately under combined load but not individual tests → PSU is the primary suspect. Measure 12V rail voltage under load with a multimeter.
- If CPU temperatures spike above 90°C within the first 5 minutes → Thermal paste or cooler contact issue. Reseat the cooler, replace thermal paste.
- If GPU artifacts appear before temperature reaches limits → VRAM instability or GPU core instability. Try stock clocks if overclocked. If at stock, the GPU may be failing.
- If Prime95 reports errors but temperatures are fine → RAM instability. Run MemTest86 to isolate. See our RAM failure signs and testing guide for the full MemTest86 workflow.
- If crash happens after 20+ minutes but not earlier → Thermal issue that takes time to develop. Dust in heatsink fins, dried thermal paste, or insufficient case airflow.
After fixing the identified problem, run the stress test again. A fix is confirmed when the machine passes the same test that previously failed.
Stress Testing Multiple PCs: The Fleet Approach
For IT professionals validating machines before deployment or after repair, manual individual stability tests do not scale. Running a one-hour OCCT test on 20 machines simultaneously requires either 20 monitors or a remote method to observe results.
HeavyLoad (free from JAM Software) is designed specifically for IT fleet pre-deployment testing — it is configurable, lightweight, and can be scripted. For seeing the results of simultaneous stress tests across multiple machines without physically sitting at each one, a monitoring solution that shows all machines' CPU and GPU temperatures in a single dashboard view makes fleet validation practical.
GGFix shows real-time CPU temperature, GPU temperature, and all hardware sensor readings from every monitored machine in a single fleet dashboard. Running a stability test remotely and watching the results from a central view is the same workflow whether you have 5 machines or 50. The alert system fires immediately if any machine's temperature exceeds threshold during the test — no manual checking of individual machines required.
One-Time Tests vs. Continuous Monitoring
A stress test is a snapshot. It confirms the hardware is stable on the day of the test. What it cannot tell you:
- Whether CPU temperatures at the same workload are 8°C higher than they were six months ago (early sign of thermal paste degradation or fan bearing wear)
- Whether a fan's RPM is declining month over month (early sign of bearing failure before it stops entirely)
- Whether a 12V voltage reading that was 11.85V in January is now 11.62V in April (early sign of PSU degradation)
The Intel 13th and 14th generation CPU degradation situation in 2024 illustrated this exactly. According to Intel's own engineering report, a microcode issue caused excessive voltage requests that degraded the IA core circuit over time — silently, without any single crash that would trigger a support call. Machines that passed stress tests continued to degrade gradually. A monitoring system that tracked performance over time would have surfaced the degradation pattern weeks before it became a stability problem.
Stress test to establish a baseline. Monitor continuously to protect it.
The practical difference: a stability test takes 1-2 hours and gives you a pass/fail snapshot. Continuous monitoring runs 24/7 for zero additional effort after initial setup. The two-layer approach — validate with stress testing before deployment, protect with monitoring after deployment — is the fleet management standard that prevents emergency hardware replacements.
Frequently Asked Questions
Q: Can a stress test actually damage my CPU or GPU?
No, with one caveat. Modern CPUs and GPUs throttle before reaching damage temperatures — they will reduce clock speed or shut down rather than allow heat damage. A stress test can expose a system that was already near its thermal limit, causing it to throttle or crash during the test. This is the test working correctly. The only scenario where a stress test contributes to damage is Prime95 with AVX on a CPU that is already marginal on voltage stability from a prior overclock — but the instability existed before the test.
Q: How long should I run a CPU stress test?
For basic new build validation: 30 minutes catches the vast majority of instabilities. For pre-deployment or post-repair validation: 60 minutes. For overclocking stability confirmation: 2-6 hours minimum, with some overclockers running 24 hours for extreme settings. According to the Linus Tech Tips forums, 30-45 minutes catches approximately 95% of real-world instability cases.
Q: What is the difference between OCCT and Prime95 for CPU testing?
Prime95 with AVX generates approximately 130% of the CPU load any real application produces — it is deliberately unrealistic to expose marginal stability. OCCT uses more representative workloads and adds automatic temperature cutoffs (stops at 85°C by default). For most users, OCCT is preferable because it tests at realistic loads and prevents accidental overheating. Prime95 is the choice for overclockers who want maximum torture testing. For fleet pre-deployment validation, OCCT's 60-minute test with thermal cutoff is the correct tool — Prime95 without AVX adds marginal additional coverage at the cost of more complex result interpretation.
Q: Is FurMark safe to use on my GPU?
Yes, with time limits. FurMark pushes GPU power draw beyond what any game produces, which stresses the thermal and power delivery systems. Running it for 10-20 minutes is appropriate for validation. Extended runs beyond 20-30 minutes add little additional diagnostic value and put sustained stress on the PSU's 12V rail. FurMark does not damage properly functioning hardware — it exposes hardware that was already failing or marginal.
Q: My PC passes individual CPU and GPU tests but crashes under combined load. What does that mean?
This pattern almost always indicates PSU strain. The 12V rail supplies both CPU and GPU. Under combined peak load, current demand can be 3-4x higher than idle. A PSU that is undersized, aging, or has degraded capacitors may not maintain voltage regulation under this combined draw. Measure the 12V rail voltage under combined load with a multimeter. Below 11.4V under peak load is a strong indicator of PSU degradation.
Q: How do I stress test multiple PCs at once for a fleet deployment?
Run OCCT or HeavyLoad simultaneously on each machine (can be scripted or pushed via remote deployment tools). The challenge is observing results across all machines — physically checking each machine during a 60-minute test is impractical at scale. Hardware monitoring software that shows all machines' temperatures and sensor data in a single dashboard view makes fleet stability testing practical. GGFix displays real-time sensor data from every monitored machine, so you can watch a fleet-wide stability test from a single screen and get immediate alerts if any machine exceeds temperature thresholds.
Find out what's really causing your GPU crashes — including which app.
GGFix logs every sensor reading and the top 25 processes every minute, so when a crash happens you can see exactly what caused it: the temperature, the responsible application, and the Event Log entry — all in one place.
- 3-day free trial — no credit card, 1 machine included
- Installs silently as a Windows Service (2 minutes)
- 50+ sensors + top 25 processes monitored every minute
- Auto-decodes BSODs and Event IDs 41 / 1001 / 219 / WHEA
- AI names the exact app that caused any crash or spike
- Telegram or email alerts in under 10 seconds
| Scenario | Typical cost (USD) |
|---|---|
| GPU replacement (after preventable failure) | $600 – $2,500 |
| Lost render time (crashes per week) | $250 – $800 |
| Emergency technician + diagnosis | $120 – $400 |
| Preventive maintenance (when flagged early) | $50 – $130 |
| GGFix monitoring (per machine / month) | $20 |
| GGFix monitoring (per machine / year — 2 months free) | $200 |
Early warning is the cheapest insurance you can buy. GGFix catches problems when the fix is still cheap — and names the exact app, sensor, or BSOD code responsible.
On-site PC & laptop repair · Copenhagen
In Copenhagen with this exact problem? GGFix fixes it hands-on — often cheaper than replacing the machine.
Fixed prices from 399 DKK for graphics card repair, all brands, on-site or drop-off in Ishøj — with an honest diagnosis before you commit to anything.
See graphics card repair pricesGGFix Technical Team
Writing about hardware monitoring, fleet management, and keeping machines alive. Powered by GGFix.
Related Articles
GPU Artifacts: What They Look Like and What Causes Them
GPU artifacts range from fixable driver issues to signs of permanent VRAM damage. Here is how to identify which type you have, what temperatures trigger them, and whether your graphics card is recoverable.
PC Maintenance Schedule: The Complete Checklist (Daily to Annual)
The complete PC maintenance schedule for businesses — weekly, monthly, quarterly, and annual tasks with time estimates, environment adjustments, and the real cost of skipping it.
NVIDIA RTX 4060–5090: Temperature Limits by Model
RTX 4090 and RTX 5090 have different temperature limits. The hotspot temperature runs 15-25°C above the core temperature every card reports. Most monitoring setups only watch the core — which means most monitoring misses the actual failure threshold. Here are the exact numbers for every RTX card.
[ free 3-day trial · no credit card ]
Know before it breaks.
GGFix installs in 2 minutes and starts watching your hardware immediately — CPU temps, GPU load, disk health, fan speeds, and 50+ sensors. AI tells you what's wrong before it causes damage.