How to Clean Dust From Your PC: Complete Guide (2026)

Your CPU might be throttling right now and you'd never know.
Sustained temperatures above 85°C shorten CPU lifespan and tank performance — silently. GGFix watches every sensor (including the hotspot most tools hide) and alerts you the moment a reading drifts above its 30-day baseline, not just when it crosses a static threshold.
Start 3-Day Free TrialNo card requiredDust is the leading cause of preventable thermal damage in desktop PCs. Over weeks and months, particulate accumulates on heatsink fins, fan blades, and intake filters — reducing airflow, raising temperatures by 5-30°C, and pushing components into thermal throttling or premature failure. This guide covers the right tools, the correct technique, how often to clean based on your environment, and — critically — how to verify the clean actually worked. For a broader maintenance schedule that situates dust cleaning within a complete PC care routine, see our PC maintenance schedule guide.
Why Dust Accumulation Is a Thermal Problem, Not Just Cosmetic
Dust acts as thermal insulation. A layer of dust 2-3mm thick on a CPU heatsink can reduce its effective thermal conductivity by 30-40%, forcing the heatsink fan to spin 10-30% faster to compensate. When fan speed alone cannot compensate, the CPU throttles — cutting clock speed to reduce heat output. A throttled Core i9-14900K can drop from 5.6 GHz to 3.2 GHz under sustained load: a 43% performance reduction from accumulated debris.
The thermal impact scales with accumulation severity:
| Dust Level | Typical CPU Temp Increase | Fan Speed Increase | Throttling Risk |
|---|---|---|---|
| Light (1-3mm) | +5-8°C | +5-10% | Low |
| Moderate (3-8mm) | +8-15°C | +10-20% | Moderate |
| Heavy (8mm+) | +15-30°C | +20-40%+ | High |
| Severe (full filter blockage) | +20-30°C | Maximum / fan failure | Certain |
GPUs are equally vulnerable. NVIDIA's RTX 4000-series cards use axial fans that pull air through a fin array — a single layer of pet hair and dust across the intake vents can raise hotspot temperature by 12-20°C, pushing a card from a healthy 78°C into thermal throttling territory above 83°C.
The business cost is real. A creative workstation losing 20-30% render performance due to thermal throttling wastes hours per project. A fleet of 50 office PCs, each running 5% slower due to thermal load, represents roughly 2.5 FTE-equivalents of lost productivity per year — absorbed silently by the organization.
Tools You Need (and Tools to Avoid)
The right tools matter. Using the wrong ones risks electrostatic discharge damage, physical damage to components, or simply moving dust from one place to another.
What to use:
- Compressed air (canned) — The standard for light-to-moderate cleaning. Falcon Dust-Off and similar brands work well. Cost: $8-15 USD per can. If you clean more than 8-12 machines per year, a dedicated electric blower is cheaper over time.
- Electric blower (DataVac ED-500 or similar) — 500W, 70 CFM output. Reusable, produces no moisture, and has consistent pressure. Break-even vs canned air at roughly 8-12 cans ($60-90 USD). Strongly recommended for MSPs and IT teams managing multiple machines.
- Soft-bristle anti-static brush — For dislodging compacted dust from heatsink fins before blowing. Camel hair or synthetic anti-static bristles. Avoid metal-bristle brushes entirely.
- 90%+ isopropyl alcohol (IPA) — For cleaning fan blades, contacts, and optical surfaces. 90% minimum; 99% is optimal. The 70% IPA sold in pharmacies contains 30% water — unsuitable for electronics cleaning. Wait at least 5 minutes after application before powering on.
- Microfiber cloth — Lint-free, for wiping surfaces, panels, and fan blades. Never paper towels (leave fibres) or cotton rags (generate ESD).
- Anti-static wrist strap — Technically optional for cleaning (you are not removing components), but strongly recommended in dry environments. In Scandinavian winters, indoor humidity can drop below 20% — at that level, walking across a carpet builds 35,000V of static charge. CMOS components can fail from ESD events as low as 100V.
What to avoid:
- Household vacuum cleaners — Generate significant static charge and often exceed 100V ESD potential. Can destroy GPU VRAM, BIOS chips, and voltage regulation ICs in seconds. Never use a standard vacuum near open electronics.
- 70% isopropyl alcohol — Too much water. Use 90% minimum.
- Paper towels or tissues — Leave fibres and generate static.
- Compressed air held at more than 40-45° tilt — At steep angles, liquid propellant discharges from the nozzle at -51.5°C, which can cause cold-shock damage and leave moisture on PCBs. Always hold the can upright or at a shallow angle.
- Compressed air too close to components — Maintain 4-6 inches minimum distance. The pressure jet from <2 inches can dislodge SMD capacitors from PCBs.
Step-by-Step PC Dust Cleaning Process
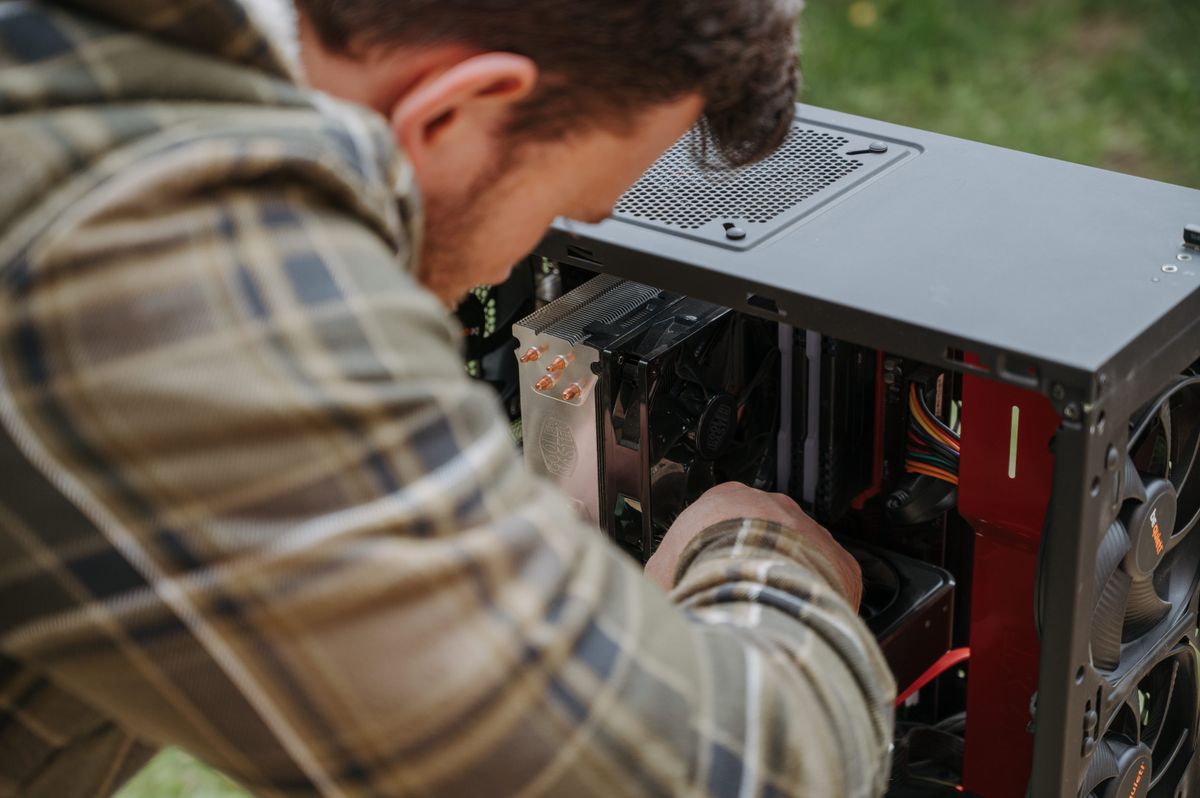
Follow these steps in order. Skipping steps — especially the grounding step or the outside-location step — is where most cleaning errors happen.
- Save work and fully power down — Do not clean a sleeping or hibernating machine. Full shutdown, power button off if the PSU has one.
- Unplug from mains power — Disconnect the power cable from the wall. Pressing the power button once after unplugging discharges residual capacitor charge from the PSU.
- Ground yourself — Put on an anti-static wrist strap connected to a grounded surface. If no strap is available, touch the metal chassis of the unplugged PSU before touching any internal components.
- Move to a suitable location — Take the PC outside or to a well-ventilated area. You will be ejecting fine particulate matter — cleaning inside a room deposits the dust back into the environment, where it is immediately re-ingested. A garage floor or outdoor space is ideal.
- Remove side panels and dust filters — Open the case. Remove any magnetic or slide-out dust filters and set them aside for separate cleaning.
- Hold fan blades still before blowing — This step is missed by most DIY guides. Fan bearings — especially sleeve bearings — are not designed for high-speed rotation without load. Overspin from compressed air can destroy sleeve bearings and, more critically, cause back-EMF events that damage the fan header control ICs on the motherboard. Insert a pen, zip tie, or finger to hold each fan blade assembly stationary before applying compressed air.
- Blow dust out, not deeper in — Direct the air stream toward case vents and exits, not toward components. Work from the back of the case toward the front, from top to bottom. For heatsink fins, blow perpendicular to the fin channels — not down into them. For the PSU, blow through the fan grille from outside; do not direct air deeper into the PSU housing.
- Clean filters separately — Wash removable fabric filters with warm water and mild soap. Allow to dry completely (minimum 30 minutes, ideally 2 hours) before reinstalling. A wet filter with power-on is a short circuit risk.
- Wipe fan blades with IPA — Apply 90%+ IPA to a microfiber cloth and wipe each fan blade surface. Accumulated grease and oil from bearing wear bonds dust more effectively than dry surfaces — wiping removes this layer and slows re-accumulation.
- Reassemble and wait 5 minutes — If you used IPA anywhere, allow full evaporation before powering on. Reconnect power, boot, and immediately check temperatures.
For machines where thermal paste has dried out or cracked (visible as grey-white flaking around the IHS edges), dust cleaning alone will not solve the temperature problem. Our thermal paste replacement guide covers the re-application process — a separate procedure typically needed every 3-5 years on desktops.
If you would rather not open the case at all, GGFix offers fixed-price PC cleaning and thermal-paste replacement for customers in Copenhagen — both the dust clean and the repaste handled in a single visit.
How Often Should You Clean Your PC?
The correct cleaning frequency is not a fixed calendar interval — it is a function of the operating environment. A gaming PC in a carpeted bedroom with a long-haired dog needs cleaning every 1-2 months. The same hardware in a tile-floored server closet with no pets might run 9-12 months between cleans without measurable thermal degradation.
| Environment | Recommended Frequency | Key Factors |
|---|---|---|
| Clean office (hard floors, filtered air) | Every 9-12 months | Low particulate, no pets |
| Standard office / home (mixed floors) | Every 6 months | Average household dust |
| Carpeted environment | Every 3-4 months | Carpet releases fibres continuously |
| Pet household (dogs/cats) | Every 2-3 months | Pet hair clogs filters rapidly |
| Workshop / garage / industrial | Every 4-6 weeks | Sawdust, metal filings, high particulate |
| Smoky environment | Every 4-8 weeks | Tar bonds dust, extremely difficult to clean |
| Gaming venue / esports center | Every 6-8 weeks | High-use, open cases common, floor level |
For MSPs managing client fleets, environment segmentation is essential. Applying a single maintenance interval across all clients wastes time on clean environments and under-services dirty ones. Our case airflow optimization guide covers filter placement and intake design changes that can extend cleaning intervals by 30-50% in high-particulate environments.
Calendar-based cleaning intervals are a useful starting point, but the more reliable trigger is temperature data. If a machine's idle CPU temperature has risen 8°C over the past 8 weeks with no software changes, that is a direct signal that thermal resistance has increased — almost always from dust accumulation or dried thermal paste.
Verifying the Clean Worked: Temperature Check After Cleaning
Most technicians clean a machine, reassemble it, and move on without confirming whether the cleaning achieved anything measurable. This is a missed step that matters both for quality control and for client documentation.
After cleaning and reassembly, run a 10-minute CPU stress test (Prime95, HWiNFO64, or Cinebench R23 looped) and compare results to pre-clean baseline temperatures. A successful clean on a moderately dusty machine typically produces:
- CPU package temperature: -5 to -15°C under load
- CPU fan RPM: -200 to -600 RPM at equivalent load
- GPU hotspot temperature: -8 to -20°C under sustained load
- System noise level: Audibly reduced under load
If post-clean temperatures are unchanged or within 2-3°C of pre-clean, the dust was not the primary cause. The next steps are thermal paste inspection and, if the machine is more than 3-4 years old, likely re-application.
For fleets, manual pre/post temperature comparison does not scale. GGFix tracks temperature trends continuously across all machines — when idle CPU temperatures drift upward over weeks, the system flags the machine for maintenance before a user ever notices degraded performance. After a clean, GGFix's telemetry confirms the temperature recovery, which can be included in client service reports as documented evidence of the maintenance visit's impact.
You can set custom alert thresholds by machine type and environment — our guide to hardware monitoring alert thresholds covers the specific values to use for desktops versus workstations versus laptops. The combination of monitoring-triggered cleaning intervals and post-clean temperature verification is the difference between reactive and genuinely predictive maintenance.
Frequently Asked Questions
How often should I clean dust from my PC?
Environment determines frequency more than any fixed schedule. A carpeted home with pets needs cleaning every 2-3 months; a clean office with hard floors can go 9-12 months. The reliable trigger is temperature trend data — if idle temperatures have risen more than 5-8°C over 6-8 weeks with no software changes, the machine is likely due for cleaning regardless of when it was last serviced.
Can I use a regular vacuum cleaner to clean my PC?
No. Household vacuum cleaners generate significant electrostatic charge as air moves through their plastic components — enough to exceed 10,000V in some cases. CMOS components fail at 100V. Use compressed air (canned or electric blower) instead. ESD-safe computer vacuums exist and are acceptable for cleaning fans and filters, but they are a specialist tool, not a standard household model.
Is canned compressed air safe for PC cleaning?
Yes, with two precautions. First, hold the can at no more than 40-45° tilt — steeper angles discharge liquid propellant at -51.5°C, which can cold-shock and damage components. Second, maintain 4-6 inches minimum distance from components. At close range, the pressure jet can dislodge surface-mounted capacitors from PCBs.
What isopropyl alcohol percentage should I use for cleaning PC components?
Use 90% or higher. The 70% isopropyl sold in pharmacies contains 30% water, which is unsuitable for electronics. 99% IPA is optimal — it evaporates faster and leaves no residue. After applying IPA to any surface, wait at least 5 minutes before powering on to ensure complete evaporation.
Why do I need to hold fan blades still when cleaning?
Fan bearings — especially the sleeve bearings used in budget case fans — are not rated for the rotational speeds compressed air can produce. Overspin physically damages the bearing. More critically, a spinning fan generates back-EMF (a small electrical current), which can damage the fan header control ICs on the motherboard in rare but documented cases. Hold each blade assembly stationary with a pen or zip tie before applying compressed air.
Will cleaning dust fix my PC's overheating problem?
In most cases, yes — if the machine has not been cleaned in 6+ months and operates in a typical household environment. Expect 5-15°C temperature reduction on a moderately dusty desktop. If temperatures remain high after a thorough clean, the next likely cause is dried or cracked thermal paste on the CPU or GPU, which requires re-application rather than cleaning. Machines more than 3-5 years old often need both.
Is your PC throttling under load without telling you?
GGFix watches every temperature sensor — including the GPU hotspot most tools hide — and catches thermal problems before components degrade. AI alerts name which workload caused the spike.
- 3-day free trial — no credit card, 1 machine included
- Installs silently as a Windows Service (2 minutes)
- 50+ sensors + top 25 processes monitored every minute
- Auto-decodes BSODs and Event IDs 41 / 1001 / 219 / WHEA
- AI names the exact app that caused any crash or spike
- Telegram or email alerts in under 10 seconds
| Scenario | Typical cost (USD) |
|---|---|
| CPU/GPU replacement after thermal failure | $400 – $2,500 |
| Emergency technician callout | $120 – $350 |
| Lost workday (thermal throttling undetected) | $200 – $600 |
| Thermal paste + cleaning (early warning) | $30 – $100 |
| GGFix monitoring (per machine / month) | $20 |
| GGFix monitoring (per machine / year — 2 months free) | $200 |
Early warning is the cheapest insurance you can buy. GGFix catches problems when the fix is still cheap — and names the exact app, sensor, or BSOD code responsible.
On-site PC & laptop repair · Copenhagen
In Copenhagen with this exact problem? GGFix fixes it hands-on — often cheaper than replacing the machine.
Fixed prices from 399 DKK for PC cleaning and thermal-paste service, all brands, on-site or drop-off in Ishøj — with an honest diagnosis before you commit to anything.
See PC cleaning and thermal-paste service pricesWriting about hardware monitoring, fleet management, and keeping machines alive. Powered by GGFix.
Related Articles
GPU Artifacts: What They Look Like and What Causes Them
GPU artifacts range from fixable driver issues to signs of permanent VRAM damage. Here is how to identify which type you have, what temperatures trigger them, and whether your graphics card is recoverable.
PC Maintenance Schedule: The Complete Checklist (Daily to Annual)
The complete PC maintenance schedule for businesses — weekly, monthly, quarterly, and annual tasks with time estimates, environment adjustments, and the real cost of skipping it.
NVIDIA RTX 4060–5090: Temperature Limits by Model
RTX 4090 and RTX 5090 have different temperature limits. The hotspot temperature runs 15-25°C above the core temperature every card reports. Most monitoring setups only watch the core — which means most monitoring misses the actual failure threshold. Here are the exact numbers for every RTX card.
[ free 3-day trial · no credit card ]
Know before it breaks.
GGFix installs in 2 minutes and starts watching your hardware immediately — CPU temps, GPU load, disk health, fan speeds, and 50+ sensors. AI tells you what's wrong before it causes damage.