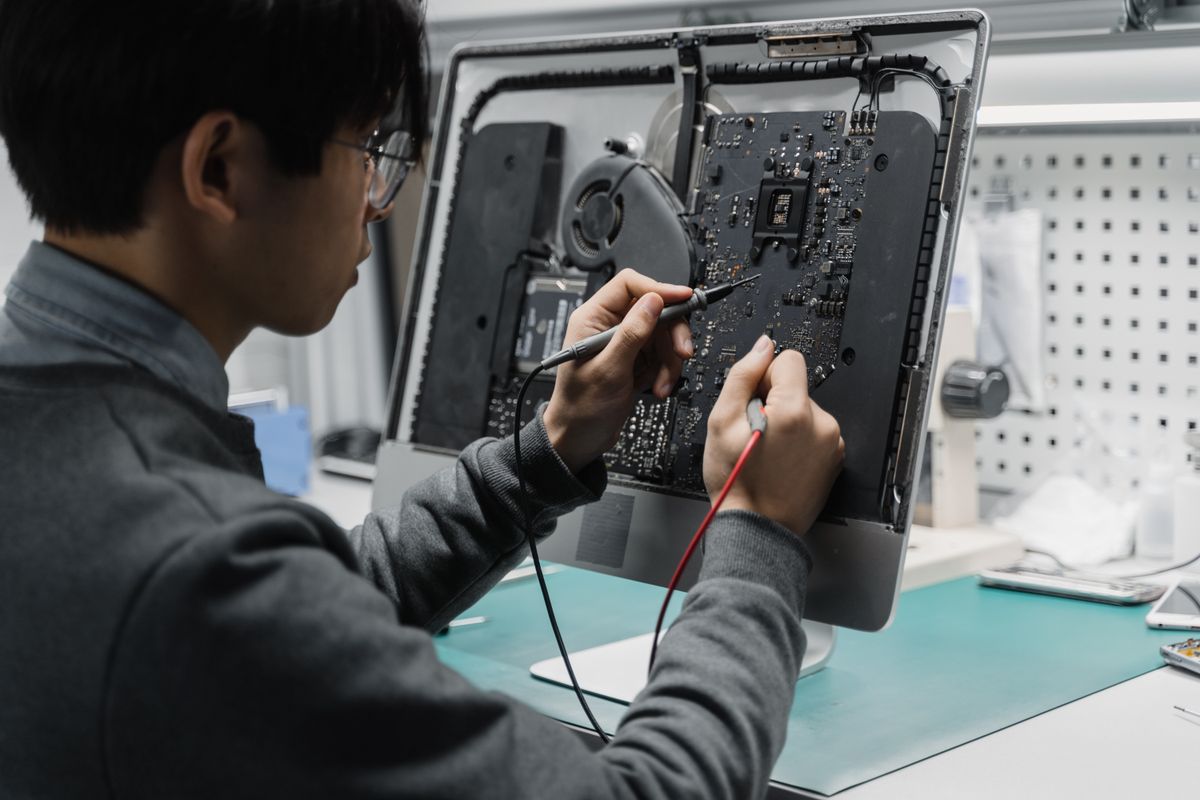
Post-Repair Validation: Confirm Your Hardware Fix Worked

Skipping maintenance doesn't save money — it defers a bigger bill.
Dust-clogged heatsinks and degraded thermal paste cause CPUs to run 15–25°C hotter than they should. GGFix detects rising baseline temps over time — the exact signal that maintenance is overdue — and tells you *which* machine to clean, not just that something is wrong somewhere.
Start 3-Day Free TrialNo card requiredA completed repair is not a confirmed repair. Hardware problems rarely announce themselves cleanly on the first day after a fix — intermittent RAM faults return under load, thermal paste that looks applied correctly fails under sustained stress, a replacement SSD with a firmware bug starts accumulating errors in week two. Without a structured validation pass, you are guessing that the repair worked rather than knowing it.
This guide covers the specific tests that confirm each type of hardware repair actually solved the problem. Not general stress tests — targeted validation sequences matched to what you actually replaced or fixed. It sits at the final step of our hardware and software problem diagnosis workflow, the point where investigation ends and verification begins.
Why "Seems Fixed" Is Not Good Enough
In 8 years of hardware repair, the callbacks that cost the most time and client trust share a pattern: the technician fixed the right problem but skipped validation. The machine left working. Two weeks later it was back on the bench.
This happens for several reasons:
Intermittent faults are statistically suppressed, not eliminated. A RAM module with one failing cell may only show errors when that specific address range is accessed. A quick reboot test after installation doesn't cover it. A quick browse around the desktop doesn't cover it. Only a methodical memory test that reads and writes every address across multiple passes confirms the fault is absent.
Heat-related fixes need thermal confirmation under sustained load. Thermal paste looks correct on the CPU die. The machine boots. Idle temperature looks fine at 35°C. But thermal paste applied incorrectly — too thick, air bubble trapped under the IHS, wrong paste for the cooler type — only reveals itself at 85°C after 45 minutes of load. A 5-minute desktop test proves nothing.
SMART data changes take time to surface. A replacement SSD may have a firmware defect that only becomes visible after write cycles accumulate. Checking SMART data immediately after installation is correct, but checking again after 7 days of use under normal workload catches a class of failures that the initial check misses.
The validation pass is not bureaucratic overhead. It is the difference between a closed ticket and a reopened one.
Validation by Repair Type
Each repair type has a specific validation method. General stress testing is useful but not sufficient for all repairs. Use the method that matches what you did.
RAM Replacement or Reseating
Required tool: MemTest86 bootable USB
Minimum test duration: 2 full passes — approximately 2-4 hours on 16 GB RAM, 4-8 hours on 32 GB
What to look for: Zero errors. Any errors, even one bit error in pass 1, means the replacement module has a fault or the wrong voltage/timing profile is active.
Common failure mode after RAM replacement: XMP/EXPO not re-enabled after installing the new modules, causing the system to run at JEDEC base speed (typically 2133 MHz or 3200 MHz instead of rated 5600 MHz or 6400 MHz). Confirm XMP is enabled in BIOS after every RAM installation.
Extended validation: If the original problem was random BSODs or application crashes, run the full workload that originally caused the issue after MemTest86 passes. Memory errors that MemTest86 catches are definitively hardware. Application crashes that persist after MemTest86 passes zero errors point back toward software.
See our complete guide to RAM failure signs and testing for interpreting MemTest86 output and handling partial pass/fail results.
Thermal Paste Replacement or Heatsink Reseating
Required tools: HWiNFO64 (free), a sustained CPU stress test
Test sequence:
- Record idle temperature after 10 minutes of desktop use — this is your pre-load baseline
- Run Prime95 Small FFTs (maximum heat generation) for 30 minutes continuously
- Watch peak CPU temperature in HWiNFO64 during the test
- Confirm temperature stabilizes (does not climb continuously for the full 30 minutes)
Pass criteria by CPU family (sustained load, not peak spike):
- Intel Core 13th/14th gen (i9): under 95°C sustained — throttling begins at 100°C
- Intel Core 13th/14th gen (i5/i7): under 90°C sustained
- AMD Ryzen 7000/9000 (non-X3D): under 88°C sustained — throttle at 95°C
- AMD Ryzen 7000/9000 (X3D): under 80°C sustained — 3D cache throttle threshold is lower
A stabilizing temperature curve — rising to 75°C in the first 5 minutes, then holding at 77-78°C for the remaining 25 minutes — confirms thermal paste is making proper contact and heat is transferring correctly. A temperature that climbs continuously for 30 minutes and never plateaus indicates poor contact, insufficient paste coverage, or an incorrectly seated heatsink.
For context on what the temperature numbers mean per CPU model and how to interpret thermal throttling behavior, see our CPU temperature guide.
SSD or NVMe Drive Replacement
Required tools: CrystalDiskInfo (SMART data), CrystalDiskMark (optional write test)
Day-of validation:
- Open CrystalDiskInfo, confirm the new drive shows Good health status
- Note the initial values of Reallocated Sectors Count (ID 05), Pending Sectors (ID C5), and Uncorrectable Sectors (ID C6) — all should be 0
- Confirm firmware version is current (check manufacturer's website for the drive model)
- Run a write test with CrystalDiskMark using 1 GB sequential write — confirm speed is within 10% of manufacturer's rated sequential write spec
7-day follow-up check:
- Reopen CrystalDiskInfo and confirm SMART attribute values remain at 0
- A drive with a developing firmware or NAND issue will often show its first reallocated sector within 7-14 days of the initial installation under normal use
For NVMe M.2 drives specifically: Check temperature under sustained write load. NVMe drives above 70°C will throttle write speeds dramatically. If write speed drops by more than 50% after 30 seconds of sustained writes, the drive is thermal throttling and needs a heatsink.
Our guide to predicting SSD failure with SMART data explains what each SMART attribute means and which threshold values should trigger concern or immediate action.
GPU Replacement or Reseating
Required tools: HWiNFO64, Furmark or OCCT GPU stress test
Test sequence:
- Confirm GPU is recognized in Device Manager with correct driver (no yellow warning triangle)
- Check GPU temperature at idle — should be under 45°C for most desktop GPUs
- Run Furmark Burn-In Test at 1080p for 15-20 minutes
- Monitor GPU temperature and GPU core clock in HWiNFO64
Pass criteria:
- NVIDIA RTX 40/50 series: GPU temperature under 83°C (Junction temperature under 90°C), no clock speed drops below boost clock
- AMD Radeon RX 7000/9000: Edge temperature under 90°C, Junction under 110°C
- No display driver crashes (TDR errors in Event Viewer)
- No visual artifacts — screen tearing, flickering blocks, incorrect colors during or after the test
PCIe power check: After seating a GPU, physically verify every PCIe power connector is fully seated. A connector that is 90% seated will cause intermittent voltage instability under load that passes light tests but fails under sustained draw. We have seen GPUs that pass a 5-minute Furmark run but fail 45 minutes into a render because one 8-pin connector was not fully engaged.
If the original problem was crashes under gaming or rendering load, run the specific workload that caused the original crash for at least 30 minutes after the Furmark test passes. See our PC crashes under load diagnostic guide for the specific symptoms that differentiate GPU hardware faults from driver issues.
PSU Replacement
Required tools: Multimeter (optional but recommended), a combined CPU+GPU load test
The PSU validation challenge: Unlike RAM or thermal paste, you cannot test a PSU in isolation on the bench without specialized equipment. Validation requires putting the full system under the load profile that originally caused problems.
Combined load test:
- Run Prime95 Small FFTs (full CPU load) and Furmark simultaneously for 15-20 minutes
- This creates near-maximum combined power draw from both CPU and GPU — the scenario that exposes PSU inadequacy
- Confirm the system runs stably through the full test without crashes, reboots, or unexpected shutdowns
Voltage measurement (with multimeter, 24-pin ATX cable):
- 12V rail under combined load: should read 11.6V – 12.4V. Below 11.4V indicates PSU cannot maintain the rail under load.
- 5V rail: should read 4.85V – 5.15V
- 3.3V rail: should read 3.2V – 3.4V
Windows validation: After the load test, open Windows Event Viewer (eventvwr.msc → Windows Logs → System) and check for Kernel-Power Event ID 41 or unexpected shutdown entries. A PSU that is failing under load will write these events. Our Windows Event Viewer hardware diagnostics guide covers what to look for and which Event IDs indicate power delivery instability specifically.
Airflow and Case Cooling Fixes
Required tools: HWiNFO64, logging enabled during a sustained workload
Airflow improvements — adding fans, changing fan configuration, replacing a case, removing dust filters — are validated by comparing temperatures under identical load conditions before and after the change. Without a baseline, you cannot confirm the fix worked.
Test sequence:
- Run a standardized load test (Prime95 for 20 minutes, same applications and settings as the pre-repair test if available)
- Log CPU, GPU, and VRM temperatures throughout
- Compare peak and sustained temperatures to pre-repair readings
A meaningful airflow improvement should reduce sustained CPU temperature by 5-15°C and GPU temperature by 3-10°C under the same load. Less than 3°C improvement after replacing fans or adding case fans suggests the cooling limitation is thermal paste or heatsink contact, not airflow.
The 3-Step Validation Framework
Regardless of repair type, every completed repair should follow this three-step confirmation:
Step 1: Component-level test — Test the specific component you replaced or adjusted using the method listed above. This confirms the component itself is functional and correctly installed.
Step 2: Workload reproduction — Run the exact scenario that caused the original problem. If the machine crashed during video rendering, render for 45 minutes. If it crashed while gaming, game for 45 minutes. If the validation tests pass but the original failure scenario fails, the root cause was not addressed or there is a second, concurrent problem.
Step 3: Event Viewer post-check — After completing the workload reproduction, check Event Viewer for new hardware errors. A clean run without generating any Kernel-Power ID 41, WHEA-Logger, or Disk error entries is the final confirmation that the system is stable.
Establishing and Using Baselines
The validation tests above tell you whether the system is healthy after a repair. But "is it healthy" is a relative question without a baseline. A CPU at 88°C sustained could be excellent for an i9-14900K or alarming for an i5-12400. A write speed of 1,800 MB/s on a Samsung 990 Pro (rated 7,450 MB/s) indicates severe throttling. Context requires numbers.
For machines where you have pre-repair temperature data, comparing post-repair temperatures against the pre-repair baseline tells you the magnitude of the improvement. For machines without historical data, the manufacturer's specifications are the reference point for drives and thermals.
For managed fleets, continuous hardware monitoring gives you a machine-level baseline built automatically over weeks of normal operation. When you re-deploy a machine after a repair, the monitoring baseline immediately shows whether post-repair temperatures and performance are within normal range for that specific machine — not just within spec, but within normal for that hardware configuration. This is why setting up hardware monitoring as part of every fleet repair workflow changes what "validated" means: it extends the validation window from a 30-minute bench test to 30 days of production data.
Fleet-Scale Validation: What Changes at Volume
For MSPs and IT teams managing 20+ machines, individual post-repair validation tests scale poorly. The component-level tests remain the same, but the overhead of manually running MemTest86 and a 20-minute stress test on every machine after every RAM swap becomes a bottleneck.
Two changes at fleet scale:
Automated post-repair monitoring: Deploy continuous monitoring immediately after a repair is completed. Set alert thresholds tighter than normal for the first 7 days — flag any temperature spike or SMART anomaly immediately rather than at the standard threshold. This converts the validation window from a one-time bench test to a 7-day monitored period.
Failure pattern tracking: When a repair type shows a higher-than-expected callback rate — RAM replacements that fail within 30 days, thermal paste jobs that degrade within 6 months — the monitoring data surfaces this pattern across machines. Understanding hardware monitoring alert thresholds and configuring them per repair type gives fleet technicians the feedback loop that individual bench tests cannot provide at volume.
Frequently Asked Questions
Q: How long should I test hardware after a repair before declaring it fixed?
Minimum: complete all component-level tests (MemTest86 for RAM, 20-30 minute stress test for thermal repairs) plus a 30-minute reproduction of the original failure scenario. For client machines or production systems, a 7-day monitoring period under normal use is the standard for confident sign-off. Intermittent hardware faults can take days or weeks to manifest under normal workloads.
Q: Can I just run Windows Memory Diagnostic instead of MemTest86 for RAM validation?
Windows Memory Diagnostic is a basic test that catches obvious failures but misses many intermittent and partial faults. It runs one pass of a subset of memory tests. MemTest86 runs multiple test algorithms over multiple passes and is significantly more thorough. For professional validation of RAM replacement, MemTest86 is the correct tool. Windows Memory Diagnostic is acceptable only for quick initial screening.
Q: My repair passed all validation tests but the original problem came back in 2 weeks. What happened?
Either the root cause was not fully addressed, or there is a second concurrent failure. The most common scenario: a machine that crashed due to thermal paste degradation also has a dying SSD that was not causing symptoms at repair time but developed into a failure two weeks later. When a validated repair fails in the field quickly, run the full diagnostic sequence again from scratch rather than assuming the previous repair was done incorrectly.
Q: Should I benchmark a PC after a repair even if the repair was not performance-related?
Yes, for NVMe drive replacements specifically. A new NVMe drive that benchmarks significantly below its rated sequential speed indicates either thermal throttling (no heatsink, poor M.2 slot airflow) or a drive with a firmware issue. This won't show up as a health problem in SMART data initially but will cause user-facing slowness. CrystalDiskMark sequential read/write test takes 2 minutes and catches this class of problem immediately.
Q: How do I validate a PSU replacement without a multimeter?
The practical approach without measuring tools: run a combined CPU+GPU stress test (Prime95 + Furmark simultaneously) for 20 minutes and monitor for any system instability or unexpected shutdown. This puts the system at near-peak power draw and will expose a PSU that cannot hold stable voltage under load. If the system completes the test without crashing and Event Viewer shows no Kernel-Power errors afterward, the PSU replacement is provisionally validated. Multimeter measurement is more rigorous but the load test catches the majority of failures.
Q: What is the most commonly skipped validation step?
Thermal validation after any repair that involves opening the case. Any time a case is opened and closed, heatsinks are touched, cables are rerouted, or fans are replaced, the thermal profile changes. A 20-minute CPU temperature test under load after any case-open repair takes 25 minutes including setup and catches a category of mistakes — accidentally disconnected fan headers, disturbed heatsink mounts, incorrectly replaced side panels blocking airflow — that are otherwise invisible until the machine fails in production.
Find out if your hardware has problems right now.
GGFix monitors 50+ sensors per machine plus the top 25 processes every minute, decodes BSODs into plain English, and pushes alerts to your phone in under 10 seconds.
- 3-day free trial — no credit card, 1 machine included
- Installs silently as a Windows Service (2 minutes)
- 50+ sensors + top 25 processes monitored every minute
- Auto-decodes BSODs and Event IDs 41 / 1001 / 219 / WHEA
- AI names the exact app that caused any crash or spike
- Telegram or email alerts in under 10 seconds
| Scenario | Typical cost (USD) |
|---|---|
| Emergency repair after hardware failure | $300 – $1,500 |
| Data recovery (worst case) | $500 – $2,500 |
| Lost workday per incident | $150 – $800 |
| Preventive maintenance (if flagged early) | $30 – $130 |
| GGFix monitoring (per machine / month) | $20 |
| GGFix monitoring (per machine / year — 2 months free) | $200 |
Early warning is the cheapest insurance you can buy. GGFix catches problems when the fix is still cheap — and names the exact app, sensor, or BSOD code responsible.
On-site PC & laptop repair · Copenhagen
In Copenhagen with this exact problem? GGFix fixes it hands-on — often cheaper than replacing the machine.
Fixed prices from 399 DKK for on-site PC and laptop repair, all brands, on-site or drop-off in Ishøj — with an honest diagnosis before you commit to anything.
See on-site PC and laptop repair pricesGGFix Technical Team
Writing about hardware monitoring, fleet management, and keeping machines alive. Powered by GGFix.
Related Articles
PSU Failure Signs: When Your Power Supply Is Dying
A dying PSU is the most misdiagnosed component in PC repair. Voltage instability, load-specific crashes, and USB dropouts are the real warning signs — here is what the ATX spec requires, how long quality units actually last, and which diagnostic tools work.
The Real Cost of Hardware Failure: A Business Impact Analysis
Hardware failure costs 5-10x the price of the broken component when you count downtime, lost productivity, data recovery, and emergency labor. This analysis breaks down the real numbers for small and mid-sized businesses.
PC Troubleshooting Guide: Diagnose and Fix Hardware Problems
The complete starting point for diagnosing PC hardware problems. Covers every major symptom and component failure, with step-by-step diagnostic approaches and links to in-depth guides.
[ free 3-day trial · no credit card ]
Know before it breaks.
GGFix installs in 2 minutes and starts watching your hardware immediately — CPU temps, GPU load, disk health, fan speeds, and 50+ sensors. AI tells you what's wrong before it causes damage.